

What is Crossplane?
Crossplane is a tool that allows you to use Kubernetes to build and maintain infrastructure. The intent is to serve as a centralized cross-platform control plane for your infrastructure. (You can do a lot more than build infrastructure, and there is a famous example of using it to order pizza to prove the point.) It encourages you to create opinionated definitions for your infrastructure, that can than be applied in any environment that you have configured it to work with.
Like Terraform, you declare what your infrastructure should be in a set of files, and when you apply the changes, the tool makes the environment match your declaration. With both tools, because you define your infrastructure as code, you get all the wonderful advantages of repeatability, consistency, ability to document as much or as little and where ever you like, etc.
With Terraform, if the infrastructure changes outside of Terraform, it remains that way until the next Terraform apply. With Crossplane always running and checking the state of your system, if someone changes the infrastructure outside of the Crossplane declaration, Crossplane will quickly change it back.
Crossplane is implemented as Kubernetes Custom Resource Definitions (CRDs), so using Crossplane is simple for teams that already are familiar with applying YAML files in Kubernetes.
Why this tutorial?
As I write this, Crossplane is at version 1.1. Much that has been written about crossplane, including some compelling examples to learn from, are from versions before 0.13, when Crossplane made many breaking changes to its architecture and API. This made it hard to follow online examples and impossible to implement as written – and I found no clear documentation on how to convert pre-0.13 to post-0.13 CrossPlane.
For example, I was excited to run through InfraCloud’s tutorial that teaches you how to deploy a Google Kubernetes cluster with Crossplane. They do a great job explaining the concepts, then teaching you how to implement them. Unfortunately, their tutorial was written for Crossplane 0.4.1, and Crossplane is a completely different product now. Almost nothing in the tutorial works anymore.
So, thanks to an example in the Crossplane GitHub, a lot of reading, and some good luck, I was able to build it. Here is how.
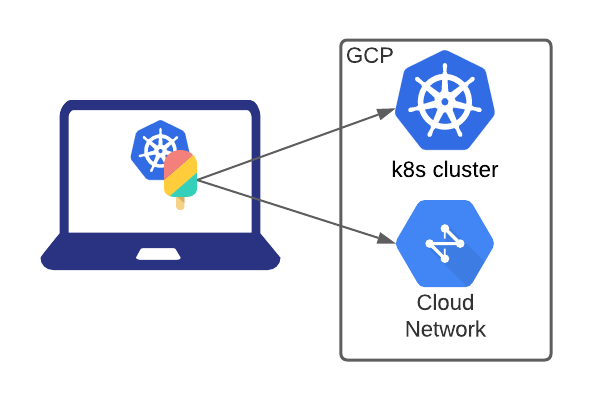
First, lets review what we’re trying to do. This guide will will walk you through the steps of using Crossplane to create a Kubernetes cluster in Google Cloud Platform, along with the requisite networking. Crossplane runs in Kubernetes, so for this tutorial, I assume you’ll install Kubernetes and Crossplane on your computer, although you could just as easily install it in a Kubernetes cluster in a cloud provider or use a hosted Crossplane provider, like Upbound Cloud.
1. Setup
A. Setup Kubernetes to host CrossPlane
As noted above, Crossplane runs in Kubernetes. So you need a kubernetes cluster to host it. I chose Minikube running in WSL2 on Windows. You should be able to use any Kubernetes installation on any platform, and there is lots of good information available on how to set up Kubernetes for your particular platform, so I won’t try to replicate it. If you happen to use WSL2 on Windows, here are some links I found helpful:
- https://learnk8s.io/installing-docker-kubernetes-windows
- https://kubernetes.io/blog/2020/05/21/wsl-docker-kubernetes-on-the-windows-desktop/
B. Install Crossplane
Crossplane provides excellent instructions on how to install it. Follow the instructions up to and including Install Crossplane CLI. In summary, you need to:
- Install Helm if you haven’t already
- Confirm Crossplane is running
- Install the Crossplane CLI
- STOP HERE. The rest of the instructions are specific to AWS, while we are using GCP.
C. Create a GCP Project if you have not yet
For this example, we’re using Crossplane to build a cluster in GCP. So you need a project in Google Cloud. At this step you don’t need a network or infrastructure set up in GCP other than your account and a project. Instructions for setting up a Google Cloud Project are here: https://cloud.google.com/getting-started. Be sure to enable billing for the project too.
For this tutorial, we are going to assume the name of the project is crossplane-test.
D. Install the Google Cloud SDK if you have not yet
Interacting with the Google API is much easier if you have the Google Cloud SDK.
At this point, if everything is set up properly, you should be able to run some gcloud commands to confirm everything is ok:
First, log in to google:
gcloud auth login
Follow the link it provides, log in to your Google account, accept the terms and conditions, copy the authorization code, and paste it in at the prompt from gcloud auth login.
Next, list your projects:
gcloud projects list
Or, if you have a lot of projects, you can list just the one you created:
gcloud projects list --filter='name="crossplane-test"'
Take a close look at your list of projects. If the NAME does not match the PROJECT_ID, note the PROJECT_ID.
2. Bootstrapping
We have Crossplane installed and running. Now we need to do the basic configuration to connect to GCP. Crossplane provides a script for performing this process, but it is fairly easy to do manually, and doing so will help you understand how Crossplane works. Crossplane’s script also enables APIs that are not necessary for this tutorial (and likely misses APIs you will use if you start using Crossplane “for real.”) So let’s skip the script and do it by hand.
Assuming you have the project created and billing configured, you need to do the following:
A. Set up some environment variables
These variables are for strings we will use a lot, or which you will likely use different values than I did. If you set them now, you should be able to copy/paste future commands with little or no editing.
# set this to the PROJECT_ID
export GCP_PROJECT=crossplane-test
# set this to whatever you want the service account name to be
export SA=crossplane-svc-acct
# don't change this
export GCP_SVC_ACCT="$SA@$GCP_PROJECT.iam.gserviceaccount.com"
# set this to the path where you want to store Crossplane's authentication key file.
# If you just use a filename (like here), it will be stored in your home directory
# Otherwise, you can specify a path and filename
export KEY_FILE="$SA-keyfile.json"
# set this to the namespace in your **Crossplane Kubernetes Cluster** where will store
# the information for the Crossplane GCP provider to connect to GCP.
# This can be the namespace Crossplane is running in (typically crossplane-system)
# but it doesn't have to be.  For this tutorial, use it.
export PROVIDER_SECRET_NAMESPACE=crossplane-system
B. Enable the compute, Kubernetes (container), and networking APIs:
These are the APIs used for this example. When you start doing different actions in GCP with Crossplane, you may need to add additional APIs.
gcloud services enable --project $GCP_PROJECT \
  compute.googleapis.com \
  container.googleapis.com \
  servicenetworking.googleapis.com
C. Create a service account for Crossplane to use to do its work and save it in Crossplane’s Kubernetes
This service account will need to be able to do everything you want Crossplane to be able to do. As with any account used by a tool that helps automate your infrastructure management, if you run Crossplane in a production environment, you should give the account the least privileges necessary and monitor the use of the account.
gcloud iam service-accounts create --project $GCP_PROJECT $SA
Once the account is created, you need to download a JSON key for the account so Crossplane can authenticate to perform the tasks we ask it to do:
gcloud iam service-accounts keys create --iam-account $GCP_SVC_ACCT--project $GCP_PROJECT $KEY_FILE
Now, we need to store that key in a secret in Crossplane’s Kubernetes namespace so that Crossplane can use the key to authenticate to GCP. There are a handful of ways to do this, the easiest is probably to create a yaml file and apply it.
cat > authentication.yaml <<EOF
apiVersion: v1
kind: Secret
metadata:
  name: gcp-account-creds
  namespace: ${PROVIDER_SECRET_NAMESPACE}
type: Opaque
data:
  credentials: $(base64 crossplane-gcp-provider-key.json | tr -d "\n")
EOF
Apply the yaml to create the secret:
kubectl apply -f
D. Grant the service account the appropriate permissions to do its work
Just like with the APIs, as you do more with Crossplane, you likely will need to add additional permissions to the service account.
gcloud projects add-iam-policy-binding $GCP_PROJECT --member "serviceAccount:$GCP_SVC_ACCT" --role="roles/iam.serviceAccountUser"
gcloud projects add-iam-policy-binding $GCP_PROJECT --member "serviceAccount:$GCP_SVC_ACCT" --role="roles/container.admin"
gcloud projects add-iam-policy-binding $GCP_PROJECT --member "serviceAccount:$GCP_SVC_ACCT" --role="roles/compute.networkAdmin"
E. Set up the GCP provider
Finally, we need to configure the Crossplane GCP provider to tell it where to get the authentication information we created in step C.
NOTE: While this can be combined with the authentication.yaml in Step C, I prefer to keep them separate because the authentication.yaml file contains sensitive information you don’t want to leave on your computer or, worse, add to source control. The provider.yaml file, on the other hand, does make sense to keep. While this is just a tutorial, and the risk if these credentials are exposed is presumably low, I prefer to set a good precedent so one doesn’t accidentally commit sensitive information to GitHub or some other repository.
cat provider.yaml <<EOF
apiVersion: gcp.crossplane.io/v1beta1
kind: ProviderConfig
metadata:
  name: crossplane-provider-gcp
spec:
  projectID: ${GCP_PROJECT}
  credentials:
    source: Secret
    secretRef:
      namespace: ${PROVIDER_SECRET_NAMESPACE}
      name: gcp-account-creds
      key: credentials
EOF
Once again, apply the yaml file:
kubectl apply -f provider.yaml
F. Check your setup
Lets double check things to make sure we are ready to proceed to creating our network and cluster.
Check 1: Confirm the GCP provider is installed and healthy.
If you run kubectl get Providers, you should see the Provider you installed in the last step. For example:
kubectl get Providers
NAME                      INSTALLED   HEALTHY   PACKAGE                           AGE
crossplane-provider-gcp   True        True      crossplane/provider-gcp:v0.16.0   11d
Check 2: Look at the ProviderConfig to make sure it contains what we created.
When we defined the Provider, Crossplane defined a ProviderConfig for us that provides details about the provider. We can check them to make sure we didn’t mistype anything.
Running kubectl describe ProviderConfig default will show more information than we need right now. At this point, just make sure it returns expected values for the Secret’s key, name, and namespace.
kubectl describe ProviderConfig default
<<<<<<<<<< lines removed for brevity >>>>>>>>>>
Spec:
  Credentials:
    Secret Ref:
      Key:        creds
      Name:       gcp-creds
      Namespace:  crossplane-system
    Source:       Secret
<<<<<<<<<< lines removed for brevity >>>>>>>>>>
3. Set up Networking
Finally, we can start to play with Crossplane!
Before we build a cluster, we first need to define the network the cluster will use. We need a network and a subnet. Using your favorite editor, create a file named networking.yaml that contains the following (you may want to change some values in this to match you personal preferences):
apiVersion: compute.gcp.crossplane.io/v1beta1
kind: Network
metadata:
  # set this to whatever you want
  name: crossplane-built-nw
spec:
  forProvider:
    autoCreateSubnetworks: false
    description: 'This is a network built by crossplane'
    routingConfig:
      routingMode: 'REGIONAL'
---
apiVersion: compute.gcp.crossplane.io/v1beta1
kind: Subnetwork
metadata:
  name: crossplane-test-subnet
spec:
  forProvider:
    ipCidrRange: '192.168.0.0/21'
    networkRef:
      # make sure this matches the network name you defined in Network
      name: crossplane-built-nw
    # pick a the closest region to you, although for a tutorial, it won't matter much which
    region: us-east1
Again, use kubectl apply -f networking.yaml to apply the file
Now, confirm the network and subnet exist by running kubectl get Networks and kubectl get subnetworks. These commands should show the network and subnet you just created, and both READY and SYNCED should show as true. If SYNCED is False, Crossplane may not be successfully authenticating with your GCP instance. (NOTE: once you fix the problem, it can take a minute or so before Crossplane will show SYNCED as True). If SYNCED is True, you should see the network in the GCP Console too.
4. Clean up our Authentication files
We still have some files with sensitive information in them lying around. Get in the habit of cleaning up any files with authentication information in them immediately. (Even better, don’t create local copies of files with sensitive information, because you might forget to remove them, or not truly remove them. But we did for this tutorial, so we need to clean them up.)
Delete authentication.yaml and $KEY_FILE. I’m using WSL, so I have shred -u available. On a Mac use rm -P and in Windows, delete the file and use PowerShell’s cipher command to securely delete the files.
shred -uz authentication.yaml $KEY_FILE
The data is still in the secret, so if you needed to get it again, you easily could.
5. Create a cluster and node pool
The yaml for creating a simple cluster and node pool is pretty extensive. So rather than creating it from scratch, I recommend downloading Crossplane’s example cluster yaml, and customizing that. Below are the items I chose to change, and why. (Do not try to apply what is written below; it is incomplete):
metadata:
  # name the cluster whatever you want
  name: example-cluster
spec:
  forProvider:
    addonsConfig:
      # if you are going to use this cluster, you may wish to enable httpLoadBalancing
      # depending on the types of services you'll deploy
      httpLoadBalancing:
        disabled: true
    # match the location of the network you created
    location: us-east1
    # set the network to match the network we created in Step 3
    network: "gke-test"
    networkPolicy:
      enabled: true
      provider: CALICO
    podSecurityPolicyConfig:
      enabled: true
---
kind: NodePool
metadata:
  # name the nodepool whatever you want
  name: crossplane-np
spec:
    clusterRef:
      # specify the cluster name you used above
      name: example-cluster
    config:
      # you can use a smaller (or larger) machine if you wish
      machineType: n1-standard-1
      # delete this line. It conflicts with the machineType line above
      # (or leave it in and determine what happens)
      machineType: n1-standard-2
    # match the locations of the network we created in Step 3
    locations:
      - "us=-east1"
This will take a while to build. You can follow its status in the Cloud Console or by running kubectl get gkeclusters and waiting until the STATE is RUNNING.
At this point, you should have a cluster running in GKE. Congratulations!
6. Tests and Explorations
Here are some things you might want to explore to gain a deeper understanding of how Crossplane works.
- What happens when you use
kubectl editto edit properties of the cluster? - If you left both
machineTypeentries in the NodePool definition, what type of machineType are your nodes?
This tutorial only scratches the surface of Crossplane and its potential. The next step is to create custom Managed Resources and Composite Resources.
7. My Opinion
I’m excited to see how Crossplane further develops and how the roles of Crossplane and Terraform play out. Will they essentially be competitors, or will they coexist in environments, each playing similar but separate roles? It may make sense for centralized DevOps support teams to continue to use Terraform for building and managing overall shared infrastructure, while also building opinionated Crossplane Composite Resources for individual teams to use for the infrastructure they maintain.
I also look forward to the GCP support maturing; Crossplane currently has managed resources for only a handful of GCP objects. With Google offering Google Config Connectors, GCP shops already have a set of CRDs that can be used for GCP infrastructure. However, Config Connectors lack Crossplane’s relatively simple option for creating opinionated and composite CRDs.
Hopefully Crossplane updates will remain stable and be backwards-compatible, at least within major version releases. If Crossplane continues to release breaking architectural changes in point-releases like they did in 0.13, they will frustrate both new users and authors of tutorials like this one.
Crossplane is still a very young project, but is developing at a rapid pace. I expect we will see its adoption rise as more teams find value in the ability to easily create opinionated CRDs, with the option of making them apply across multiple platforms.

Leave a comment